I snagged an antique Stromberg-Carlson twin-box wallphone and hooked up a SIP adapter.
One of the major goals of this project was to be minimally invasive to the extant phone hardware: ideally, no new holes drilled, no wires desoldered, etc. While this has not been entirely possible, it was surprisingly close.
Another goal is to have every feature of the old phone work on the modern system, including the magneto. This required some unanticipated effort.
About the Phone
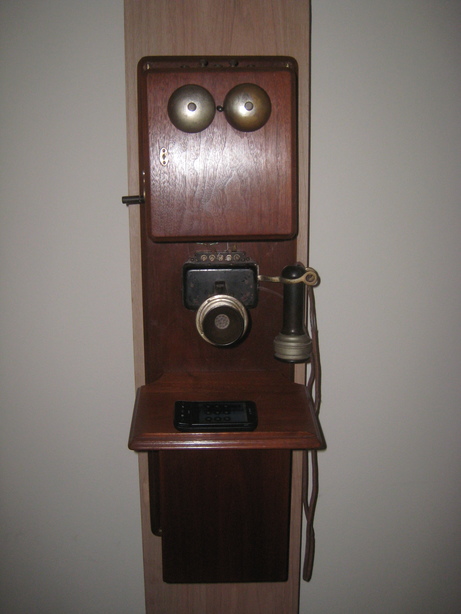
It’s a Stromberg-Carlson model 17, a “Country Party Line Bridging
Telephone”, “especially intended for heavily-loaded country party lines”.
Its exact date of manufacture is unknown, but the company catalog
(local mirror) lists it for sale as
of 1901 (above quotes from p. 10). How The Telephone Helps The Farmer
(local mirror) from 1905 does
not mention it by name but shows it or a phone much like it as a “Standard
Bridging Telephone”, “Style G-B”, on page 25.
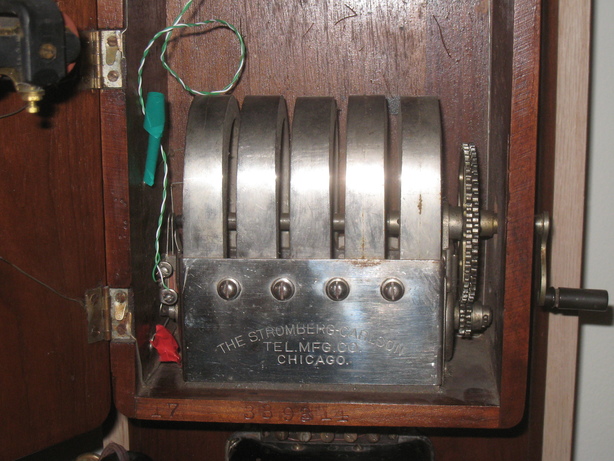
The magneto is a five-bar unit, presumably model 75 (1901 catalog, p. 53). Its faceplate is as depicted on p. 52 (contrast to the one in the 1905 publication, p. 26 and elsewhere).
The core of the phone is the Triplet unit (SC model 50; 1901 p. 55), though the triplet in this phone is somewhat different from the one shown in the figure there (notably, the hook switch is as shown in the 1905 publication, fig. 10, p. 22). The Triplet was apparently patented in 1896, and given the faceplate iconography, it is likely that this phone was manufactured before Stromberg-Carlson was purchased by Home Telephone Co. in 1904.
Identifying Marks
Stamped into the wood forming the base of the the bell/magneto box are the numbers “17” (model number) and 339314 (serial number? The last 3 is repeatedly struck to cover an errant 1). On the inside of the bell box cover, along-side one of the wires to the ringer, is a name, “O. C. Sylvester”. This can be seen in the picture of the magneto, above.
History of the Artifact
The phone was recovered by my paternal grandparents from a farmhouse of retired (presumably rural) phone equipment. My father recollects:
And I believe that the phone was superseded/discarded when an entire small-community rural exchange was taken down and replaced by Bakelite table-top dial phones, since my parents came back with that phone – I’m pretty sure it was before I went to medical school and while I was at Notre Dame, as I did not live at home nor did they live at the old house, so it was after 1965 and probably before 1967, but it could have been during my medical school days, up until 1971 – saying there had been just that one walnut phone in an entire barn filled with oak phones; and I have clear memories of seeing such antique dealer barns stuffed with such phones when similar Bell-system take-overs occurred, which happened in rural Illinois into the mid- to late-‘60’s and after.
At some point in the history of the device, it was rendered inoperative by the truncation of the battery feed lines: they had been cut directly at the back board within the lower box; speculatively, it is possible that the lugs had corroded to the cells and, since the phone was being discarded anyway, they were simply cut off as an expedient. These cut wires have now been removed, freeing up their routed paths for this project.
Furniture
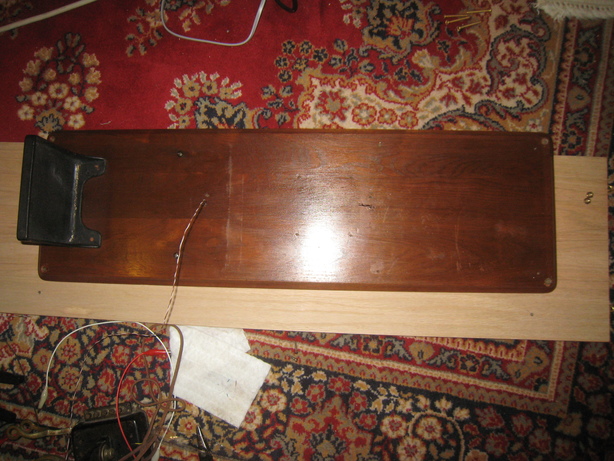
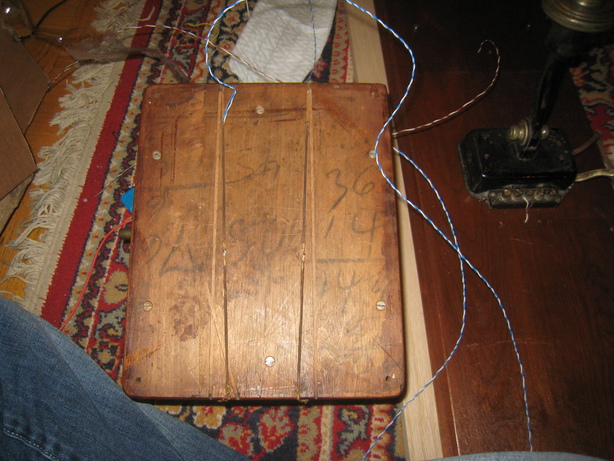
Since I don’t know where life will take me or this phone, my dad and I built a custom piece of furniture for it. The most note-worthy thing is that we routed paths on the back to follow the routes on the back of the phone: the wires leaving the battery box for the outside world are recessed and the whole ensemble can rest flat against the wall.
Electronics
The SIP adapter used in this project is a GrandStream HandyTone 503 which provides one each of FXS and FXO. It was selected because it will consume pulse dialing and emit SIP DTMF events to the back-end (the apparently more widely used Sipura/Cisco/Linksys devices don’t). It has a very verbose syslog client as well, which eliminates a good bit of guess-work as to what it sees.
The phone is a twin-box magneto, so it was intended to provide local power for both talk and ringing. Some phones, even local battery phones, shipped with condensers to facilitate later conversion to central power. This phone, however, clearly never had one, nor did its maker anticipate the need. (Which may suggest why it was discarded.)
The Triplet has five screw connectors on the top. Left-to-right, these are (intended to be) L1 (tip), Battery -, Battery +, Pass-through, L2 (ring). The receiver (speaker) is connected internally by two more screw terminals. The transmitter (microphone) has one wire dedicated and uses the case for the other. I have not yet checked if the “induction coil” inside the Triplet is a true transformer or center-tapped single winding.
Rewiring the Triplet
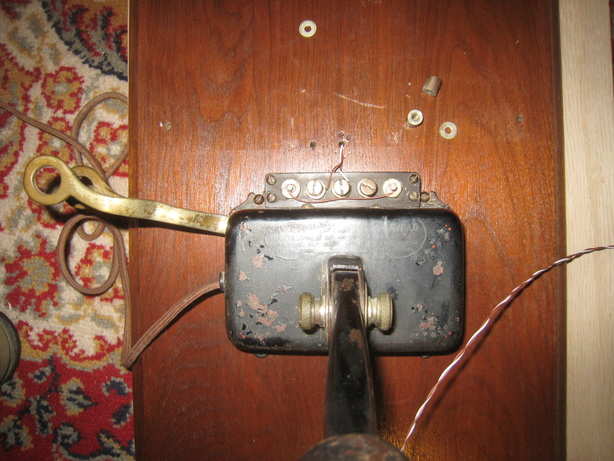
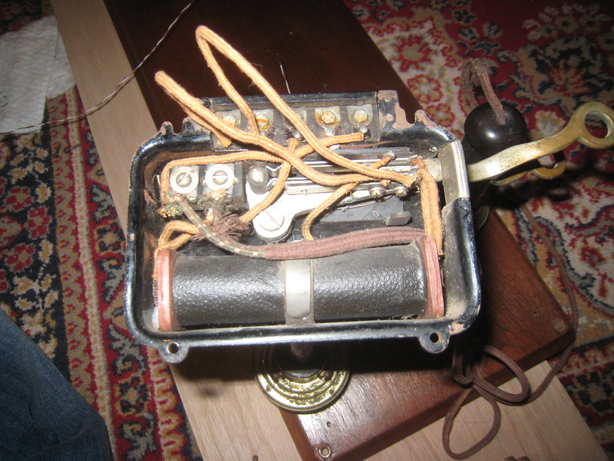
Remember, the phone is intended to have local batteries to operate its microphone. In the modern era, the telephone company (or equivalent) instead supplies this power, so the schematic “inverts” itself. Previously, the receiver and secondary winding were, in series, connected to the phone line, with the microphone inductively coupled. Now, the transmitter and primary winding, again in series, connect to the phone line and the receiver is inductively coupled to the line.
The Triplet, if it is not to be re-soldered, has a few fixed pieces of circuitry:
Between the battery terminals atop the triplet, the microphone, hook switch (open when on-hook), and the primary winding are coupled in series.
The secondary winding is connected to one of the receiver’s terminals and to the open-on-hook side of a switch. (The closed-on-hook side of that switch is the “pass-through” terminal atop the Triplet.)
The other receiver lug and the center position of the above switch are the tip and ring (respectively) terminals atop the Triplet.
If we short the tip and ring connectors atop the Triplet, then, when the phone is off-hook, the secondary winding and the receiver are connected back to back, as required. If we connect tip and ring to the battery connectors, then we will have the transmitter, hook, and primary winding in series between the two; in particular, tip should be connected to “Battery +” and ring to “Battery -” (as one might expect, recalling that ring is at -48VDC). However, to leave the case of the triplet at ground, I have chosen to switch tip and ring. Given the passive nature of the components, this should not matter.
The phone line is routed to the battery box using one of the old battery wire routes and is connected to the FXS port on the SIP bridge.
Adding a Condenser
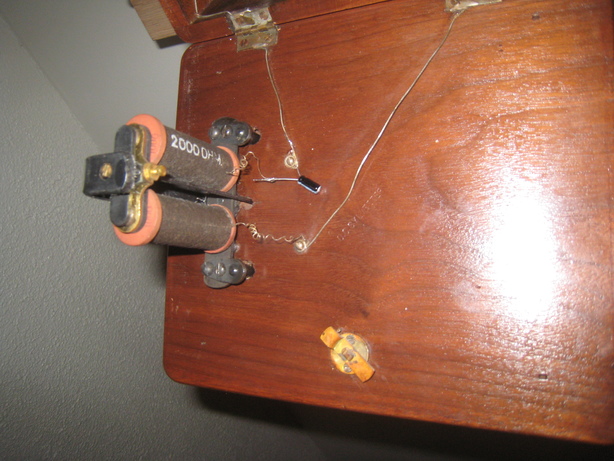
To make the ringer useful again, we need to add a high-pass filter in the form of a condenser (capacitor) in series with the ringer. Stromberg-Carlson didn’t make this easy on this particular phone. I desoldered the ringer from the wires leading to it and introduced a decidedly non-period capacitor.
Handling the Magneto
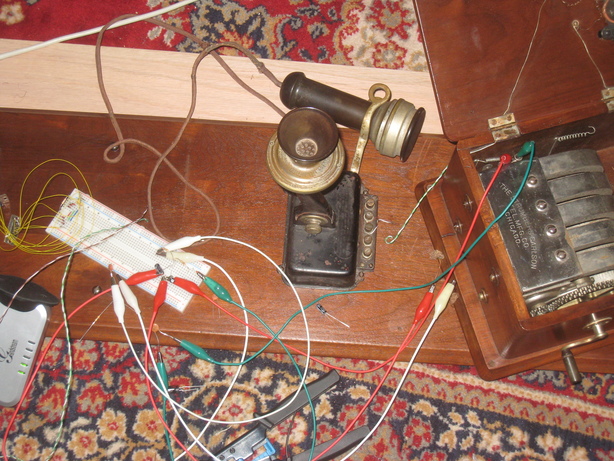
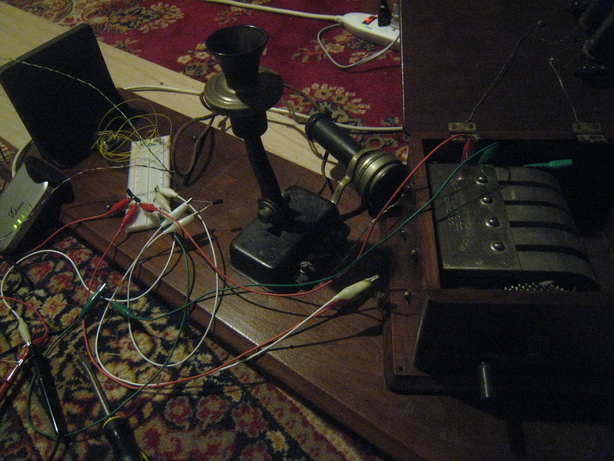
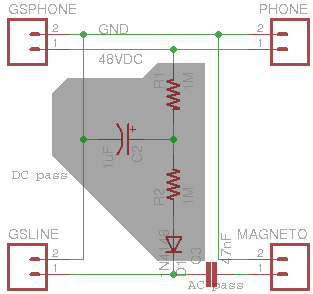
One would wish that FXS devices on the phone network were, by fiat, required to do something sensible when they encountered ringing voltage on the line. Sadly, that is not the case. Further, FXO ports seem to consider it antisocial to provide ringing voltage without also providing line voltage (though the off-the-shelf phone used for testing had no problem ringing given only ringing voltage). We therefore engage in a little hackery.
The magneto is removed from its usual position in the circuit (and the old bare wire connectors insulated beneath some electrical tape!). Another pair of wires is routed from the battery box to the bell/magneto box using some free routes and the other of the old battery wire routes. We use a low-pass filter and a diode from the FXS line to the FXO side, and add a high-pass-filtered magneto (another capacitor in-line, just as with the ringer, above) to the FXO side:
The EAGLE schematic is available here.
Adding a Rotary Dial
I have subsequently added a mid-1900s-era Western Electric (I know, I know; this particular dial had emotional significance, being from my paternal grandmother’s phone) rotary dial to the system, mounted to the frame below the phone. (Recall the goal of zero modifications to the phone; mounting elsewhere would have been tricky.) To house the dial, my father constructed a wooden frame from two pieces of board atop each other, and applied a circular drill bit matched to the dial. This left enough room behind the dial for a bus-bar demarcation, as inside the battery box, above.
Rotary dials have two switches: the pulse switch (normally closed, opens once for each position rotated, at a steady rate), and a “dialing” switch (normally open, closed when the rotor is in motion). The purpose of the latter is to silence the receiver and prevent the user from hearing the pops induced by the pulse switch.
The pulse switch simply intercepts the tip line to the phone; the dialing switch runs into the triplet unit through the hole for the receiver cable and shorts across the receiver terminals. Thus the receiver is effectively taken out of the circuit when dialing, and no sparks emerge as the resistance of the induction coil winding acts as a sink.
All Told
The phone was reassembled, and the alligator-clip-based prototype was turned into a breadboarded circuit placed in the battery box along with the VoIP SIP adapter. All incoming connections (power, ethernet, magneto, triplet) are demarced via a bus-bar. No new holes were drilled but, I confess, the battery-wire holes in the backboard were ever so slightly enlarged to make these cables fit.
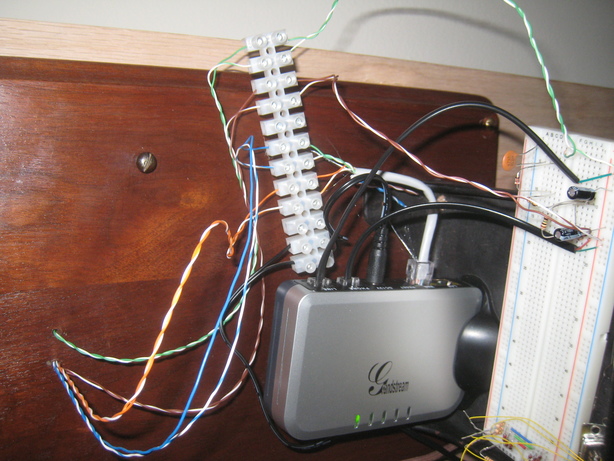
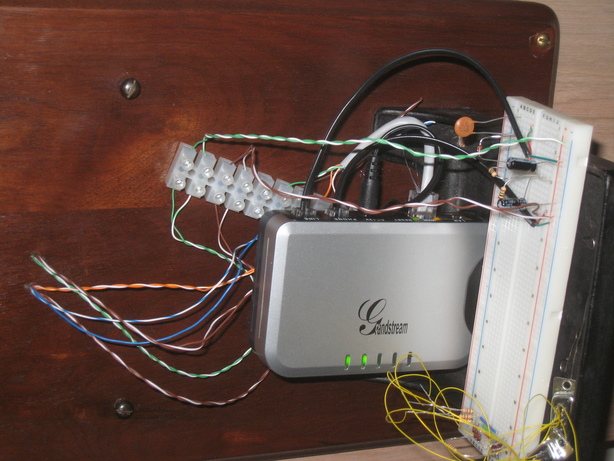
The breadboard was eventually replaced with a hand-soldered PCB:
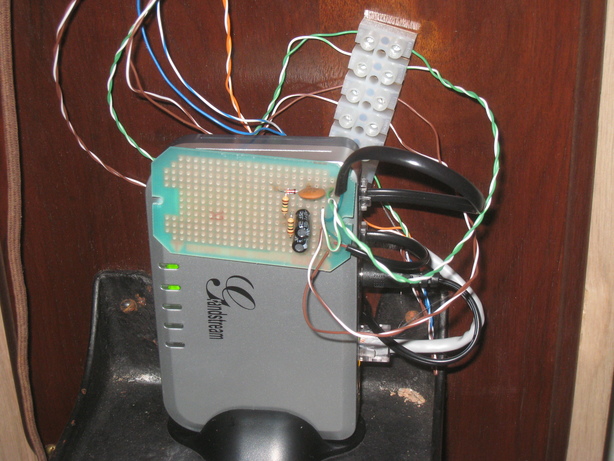
Other Pictures Of The Hardware
Software
HandyTone Software Configuration Notes
I’ve pointed the SIP adapter at a local Asterisk instance and overridden all local dialing decisions for increased flexibility. This is not necessary, but in case anybody is curious, there are relatively few instructions here:
FXO and FXS have their SIP servers set and account information filled in. For me, that’s
asterisk.oc.ietfng.org. The two ports show up as two different peers, which I’ve creatively namedgsfxsandgsfxofor now.The FXS line is set to
Offhook Auto-Dialextensions, making its Asterisk context behave like expected.Be sure to use SIP INFO for
Preferred DTMF method(force it on one or the other end; on newer HT503 firmwares, use theYes (use above DTMF order without negotiation)option): the HT firmwares do not correctly generate RFC2833 events for pulse dialing, but they will generate SIP INFO events. Hardly ideal, but I’ve written to them to let them know.I have Hook Flash events turned on, but Asterisk does not yet parse them correctly (XXX patch in the works).
The
Unconditional Call Forward to VOIPoption onBasic Settingsis set tocrank@asterisk.oc.ietfng.orgI set
Life Line ModetoAlways Disconnectedmostly out of a feeling of honesty.
Asterisk Configuration Notes
Asterisk is already configured to make and receive calls from my Google Voice number (though really any VoIP provider will do; if your provider is SIP-based, you may be able to entirely avoid the Asterisk intermediation). I have one context for the phone, gs, and have instructed sip.conf that both the FXO and FXS ports land in that context.
A connection from the FXO side begins its life at the crank extension. Currently, the only thing there is
[gs]
exten => crank,1,Dial(SIP/gsfxs,1)     ; user turns crank
exten => crank,n,Hangup()
which causes the FXS side to ring back, in a kind of ping test.
A connection from the FXS side begins its life in s as is typical. For testing purposes, I used
exten => s,1,Background(demo-instruct)
exten => 1,1,SayDigits(1234567890);
but I have also used, back when google voice worked over XMPP,
exten => s,1,Dial(gtalk/asterisk/+NNNNNNNNNNN@voice.google.com,30)
to make it a sort of hot-line to another number. With the rotary dial in place, or with a DTMF tone dialer (assuming the mic decides to cooperate) I can, of course, do pulse-dialing-based commands:
exten => s,1,Set(TIMEOUT(digit)=20)     ; user lifts reciever
exten => s,n,Set(TIMEOUT(response)=20)
exten => s,n,Answer()
exten => s,n,Playtones(350+440)         ; provide dial tone
exten => s,n,WaitExten()                ; dispatch dynamically

exten => 1,1,Playtones(congestion)      ; functionality test
exten => 2,1,Dial(SIP/[redacted]@voipms,30) ; speed dial!

exten => 9,1,DISA(no-password,voipms-out) ; outgoing line
Receiving calls can be similarly simple:
[voipms]
exten => NNNNNNNNNN,1,Dial(SIP/gsfxs,30,o)
Miscellany
Acknowledgements and Links
Thanks to many out there on the Internet for procuring and archiving relevant material. This project would not have been nearly this easy without their efforts.
Many thanks are due to my parents for enduring my insufferable chatter about ancient telephony during the holiday season of 2010. To my father go thanks for his efforts in the house’s wood shop, without which the custom mount for the telephone and dial would not have been possible.
High-resolution Images
TODO
The connections to the outside world (Ethernet and power) are sketchy and could be made less so.
The microphone may need some attention; it is, apparently, hard to understand me, and DTMF from a tone dialer does not always get picked up well.
Doing It Again
I replicated this project for a friend’s birthday. That setup uses a single-box phone with a built in computer (a DIR-825 wireless router denuded of its plastic; subsequently, that board having failed, it was replaced with a Raspberry Pi and a 12V/5V step-down DC converter) in addition to the SIP adapter and has a dial added directly in to the main box. As per usual, the interface between the electronics and the phone body and dial is done via a demarcation bus bar to keep things modular.
This phone arrived pre-converted for remote battery power and had a condensor already in place at the top-right of the box. That existing condensor is used in the new circuitry rather than a new one being added.
This phone had all of its wires soldered to big lugs on the back of the “crown” connector on top. A hot air gun, soldering iron, flux, and patience was used to separate the old leads, which were wrapped in electrical tape and left in position. The original phone leads at the top are in fact connected to the FXS side and could be used to run other phones off the electronics in this one. A few new leads were added internally, using obviously different wire to highlight the modifications should anyone study the object in the future; power was brought in through an existing cable hole.
